3D Resin Yellowing: Science, Reversal, and Performance
3D resin yellowing: understand the science, reverse the problem, and ensure optimal performance. Complete SmartDent technical guide.
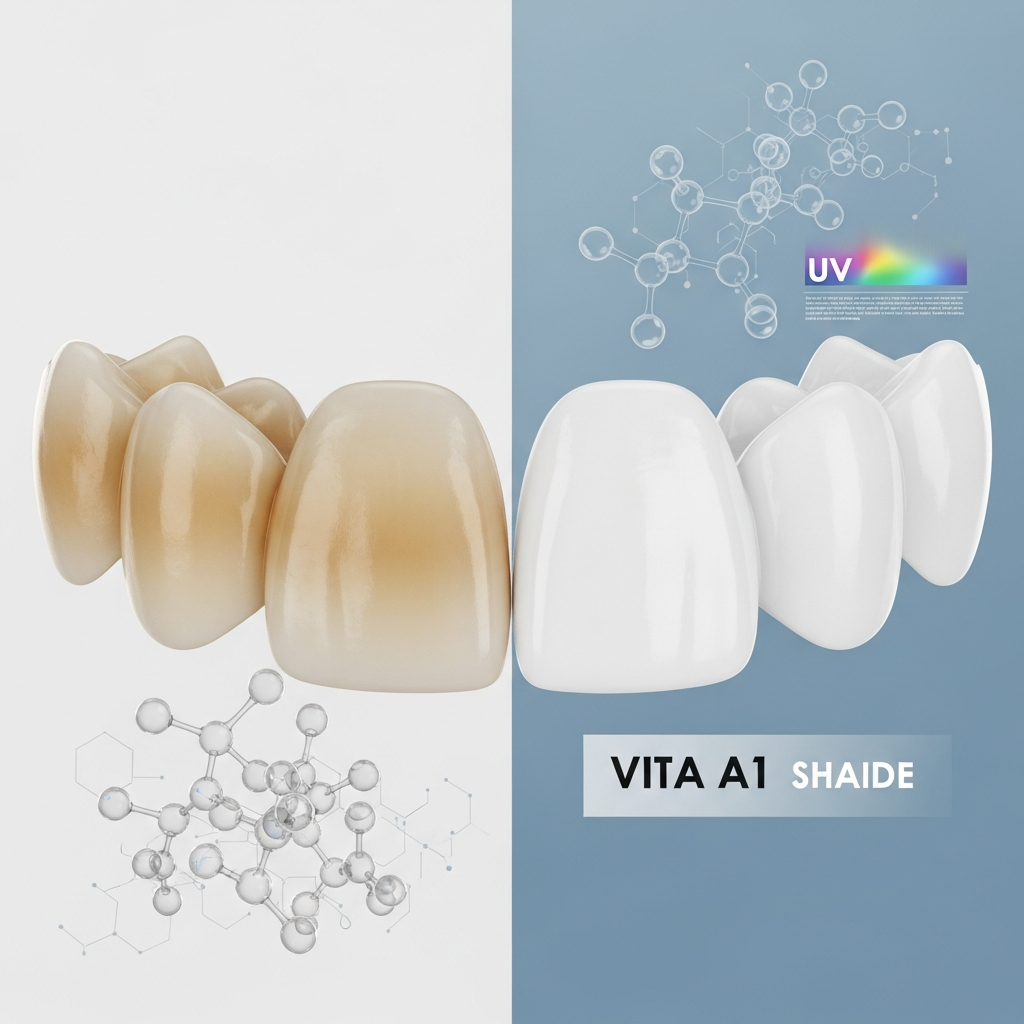
3D resin yellowing: understand the science, reverse the problem, and ensure optimal performance. Complete SmartDent technical guide.
Complete Technical Guide: Yellowing in 3D Printed Resins – Science, Reversal, and Performance
In tooth-colored 3D printed resins, initial yellowing is often interpreted as an aesthetic defect. However, SmartDent, as an official distributor of leading digital dental brands and a national reference in complete digital dentistry workflows, understands that, from the perspective of materials science, this phenomenon indicates high photoinitiator activation and a high degree of monomer-to-polymer conversion. This article demystifies yellowing, presenting scientific evidence and protocols for its reversal without compromising the mechanical and biological performance of the parts.
🔬 The Science Behind It: Composition and Performance
160 MPa Flexural Strength (FS) after heat treatment
7,387 MPa Flexural Modulus (FM) after heat treatment
+7.4% FS / +9.1% FM Gain in mechanical properties with heat treatment
Chemically, printed resins for dentistry, such as SmartDent's Smart Print Bio Vitality, are composite resins with an organic matrix (Bis-GMA, UDMA, TEGDMA), inorganic filler (silica, glass, zirconia), and photoinitiators. The crucial difference lies in the polymerization process, which occurs in successive layers cured by LCD/UV panels at specific wavelengths (365–405 nm).
Initial yellowing, far from being a defect, is an indicator of efficient photocuring. The greater the conversion of monomers to polymers and cross-linking, the better the mechanical properties and the lower the cytotoxicity. UV photoinitiators, such as TPO/BAPO, when excited, generate free radicals that initiate polymerization, and some of these molecules form chromophores that absorb light in the yellow/brownish region. Reducing the photoinitiator to avoid color can compromise the degree of conversion, increase residual monomers, and worsen mechanical performance.
International studies, such as those by Lee et al. (2022) and Alfouzan et al. (2021), corroborate that color change is inherent to photocured polymers and should be controlled, not masked. Smart Print Bio Vitality, for example, has 58–59% by weight of inorganic filler and a flexural strength of 147–160 MPa, exceeding ISO 4049 (100 MPa), and maintains high chromatic stability when properly post-cured and processed.
| Parameter | Treated 150 °C / 1 min | Control (no heating) | Variation |
|---|---|---|---|
| FS – Flexural Strength (MPa) | 160 | 149 | +7.4% |
| FM – Flexural Modulus (MPa) | 7,387 | 6,769 | +9.1% |
| Elongation (%) | 4.5 | 4.3 | +4.7% |
| FS Standard Deviation | 3 | 11 | Much greater consistency in the heated group |
SmartDent's laboratory data demonstrate that heat treatment at 150 °C for 1 minute not only reverses yellowing but also significantly improves mechanical properties, such as strength and stiffness, and material consistency.
📋 Detailed Clinical Protocol for Maximum Success
Required materials: Glycerin, glass container, thermometer, tweezers, heat gun (optional), electric oven (optional), air fryer (optional).
-
Step 1: Initial UV Post-Curing Post-cure the printed part in a UV post-curing station, such as the Asiga Cure or ShapeCure D, strictly following the resin manufacturer's recommendations for time and light intensity. This step ensures initial polymerization and the development of mechanical properties.
-
Step 2: Yellowing Assessment After post-curing, observe the part. If there is slight yellowing, this is an indication of efficient photocuring and not a defect. Proceed to heat treatment for color reversal, if necessary for the final aesthetic.
-
Step 3: Heat Treatment in Heated Glycerin (SmartDent Method) Heat approximately 10 mL of glycerin in a glass container in the microwave until it reaches about 130–140 °C (check with a thermometer). Using tweezers, immerse the printed and post-cured part in the heated glycerin for approximately 30 seconds. Remove the part, let it cool, and rinse if necessary.
-
Step 4: Heat Treatment with Heat Gun (Alternative) Use a heat gun with a temperature range between 110–140 °C. Hold the part with tweezers, about 10 cm away from the nozzle. Move the hot air jet over the part for about 30 seconds per side, or until it returns to its original color. Avoid excessive localized heating to prevent deformation in thin structures.
-
Step 5: Heat Treatment in Electric Oven (Alternative) Preheat a simple electric oven to approximately 140 °C. Place the printed and post-cured parts in the oven for 60 seconds. Remove the parts, let them cool naturally, and evaluate the color.
-
Step 6: Final Verification and Storage After heat treatment, the resin should have returned to a color close to the original shade. Store the parts in an appropriate place, protected from direct light and extreme temperature variations, to maintain chromatic and mechanical stability long-term.
⚠️ Important: Always follow manufacturer's recommendations and biosafety standards. SmartDent recommends the use of professional post-curing equipment to ensure maximum efficiency and safety.
✅ Conclusion and Expert Opinion
“Initial yellowing in 3D printed resins is not an indication of failure, but rather a sign that photocuring occurred efficiently, activating photoinitiators and promoting monomer conversion. SmartDent, with its expertise in 3D printing and 3D resins, validates that, through controlled heat treatment protocols, it is possible not only to reverse this color change but also to enhance the mechanical properties of the material. This ensures that the professional delivers aesthetically and functionally superior work, without compromising the integrity of the part.”
💡 Protect Your Clinical Reputation
Use certified materials and follow protocols validated by specialists. Invest in quality digital dentistry. SmartDent offers the best solutions in 3D resin and equipment for your clinic or laboratory.
-
Albuquerque PPAC et al. Color stability, conversion, water sorption and solubility of dental composites formulated with different photoinitiator systems. Available at: PubMed
-
Alfouzan AF et al. Color stability of 3D-printed denture resins: effect of aging, mechanical brushing and immersion in staining medium. J Adv Prosthodont. 2021. Access article
-
Gad MA et al. Effect of aging on dimensional accuracy and color stability of denture base resins manufactured by conventional, subtractive and additive techniques. BMC Oral Health. 2024. Journal website
-
Lee EH et al. Effect of post-curing time on the color stability and related properties of 3D-printed resin. Journal of Dentistry, 2022. Search at: PubMed
-
de Sousa LC et al. Effects of UV postcuring times on the color stability and degree of conversion of 3D printed resins. 2024. Search at: PubMed
-
Bassenheim D et al. Color-Stable Formulations for 3D-Photoprintable Dental Resins. Polymers. 2024. Available at: MDPI
-
Pacheco LE et al. Properties of 3D-Printed resins for interim restorations. Braz Oral Res. 2025. Search at: PubMed
-
Relevant ISO standards:
Perguntas Frequentes
What causes initial yellowing in 3D printed resins?
Initial yellowing is caused by the high activation of photoinitiators (such as TPO/BAPO) during photopolymerization. When excited by UV light, they generate free radicals that initiate the formation of the polymer network. Part of these photoinitiator molecules and byproducts form chromophores, which absorb light in the yellow/brownish region. This indicates efficient curing and a high degree of monomer conversion, essential for the mechanical and biological properties of the resin.
Does yellowing mean the resin is defective or "burnt"?
No, initial yellowing is not a defect. On the contrary, in modern photopolymerizable systems, it generally indicates high photoinitiator activation and a high degree of monomer-to-polymer conversion, which is desirable for the mechanical and biological performance of the resin. The idea of "burnt resin" due to long post-curing is a myth, as most methacrylic monomers decompose at temperatures much higher than those used in curing chambers.
How does heat treatment reverse yellowing and what are the mechanical benefits?
Heat treatment, such as the 130–140 °C for 30 seconds protocol, reverses yellowing through thermal post-crosslinking (completing polymerization), oxidation and rearrangement of chromophores (degrading or reorganizing the chemical groups that cause the color), and reorganization of the polymer matrix. In addition to color reversal, this process improves mechanical properties, such as flexural strength (+7.4%) and flexural modulus (+9.1%), and increases material consistency, as demonstrated in SmartDent's laboratory tests.
What are the practical methods to reverse yellowing in the laboratory routine?
There are four main methods: 1) Heat treatment in glycerin heated to 130–140 °C for 30 seconds; 2) Use of a heat gun with a range of 110–140 °C, applying the hot air jet about 10 cm from the part for about 30 seconds per side; 3) Use of a simple electric oven preheated to 140 °C for 60 seconds; 4) Use of an Air Fryer at 110–140 °C for 60 seconds. All these methods aim at thermal post-crosslinking and the reorganization of chromophores, without compromising the mechanical properties of the resin.
What is the importance of photoinitiators in the curing and yellowing process?
Photoinitiators are at the heart of photopolymerization, absorbing light at specific wavelengths (365–405 nm for 3D printers) and generating free radicals that initiate the monomer chain reaction. Photoinitiators like TPO/BAPO are highly reactive but can cause more intense initial yellowing. The choice and balance of photoinitiators are crucial for a high degree of conversion and mechanical performance, even if this results in temporary yellowing.
Why might a resin that "doesn't yellow" not be the best option?
A resin that "never yellows" may actually be undercured or have a formulation with a lower amount of photoinitiators, which compromises the degree of conversion. This results in more residual monomers (higher biological risk) and poorer mechanical performance (lower fracture resistance, wear, and deformation). Color stability is important, but it should not be achieved by sacrificing the essential properties of the resin.
What are the main differences between conventional composite resins and 3D printed resins?
The main difference is not in the isolated ingredients, which are similar (organic matrix, inorganic filler, photoinitiators), but in the polymerization process. Conventional resins use a pinpoint beam of high-energy blue light. In contrast, 3D printed resins are built in successive layers, cured by lower-energy LCD/UV panels, at violet/UV wavelengths (365–405 nm), which requires specific photoinitiators like TPO/BAPO.
Does SmartDent offer resins that benefit from these yellowing reversal protocols?
Yes, SmartDent distributes high-performance resins, such as Smart Print Bio Vitality, which is an orthodontic nano-hybrid 3D resin. This resin, with high inorganic filler content and an adjusted photoinitiator system, demonstrates excellent flexural strength and chromatic stability when properly post-cured and processed, including the application of heat treatment protocols for yellowing reversal and optimization of mechanical properties.
What are the practical guidelines for clinicians and laboratories regarding yellowing?
It is essential to view initial yellowing as a marker of efficient photocuring and not to trade curing for immediate aesthetics. Use robust post-curing protocols, following the manufacturer's recommendations. For critical aesthetics, apply heat treatment for reversal (130–140 °C for 30-60 seconds in an oven, glycerin, or air fryer). Additionally, demand scientific documentation from the manufacturer regarding resistance tests, biocompatibility (ISO 10993), and publications that validate the material.
Where can I find more information about SmartDent resins and post-curing equipment?
You can find more technical details and information about products such as Smart Print Bio Vitality resin and post-curing equipment like Asiga Cure and ShapeCure D directly on the SmartDent online store. SmartDent is a national reference in complete digital dentistry workflows and offers specialized technical support to optimize your processes.